Control Starts in the Clinch: Why clinch mastery changes fights
When you step into the clinch, you move the fight from striking range into a battle for position and balance. The clinch isn’t just close-range grappling — it’s a platform for knees, elbows, throws, and scoring control. If you can consistently control the clinch, you dictate the pace, sap your opponent’s legs with knees, and open opportunities to finish with a takedown or decisive strike.
You should think of the clinch as a series of controllable levers: head placement, arm frames, hip alignment, and foot position. Each lever affects your opponent’s center of gravity. Train to sense and manipulate those levers rather than relying on brute force; efficiency and technique let you score more without exhausting yourself.
What you gain by prioritizing clinch work
- Superior scoring through sustained knees and positional dominance.
- Ability to neutralize a longer-striking opponent by closing distance safely.
- Opportunities to end exchanges via sweeps, throws, or damaging knees and elbows.
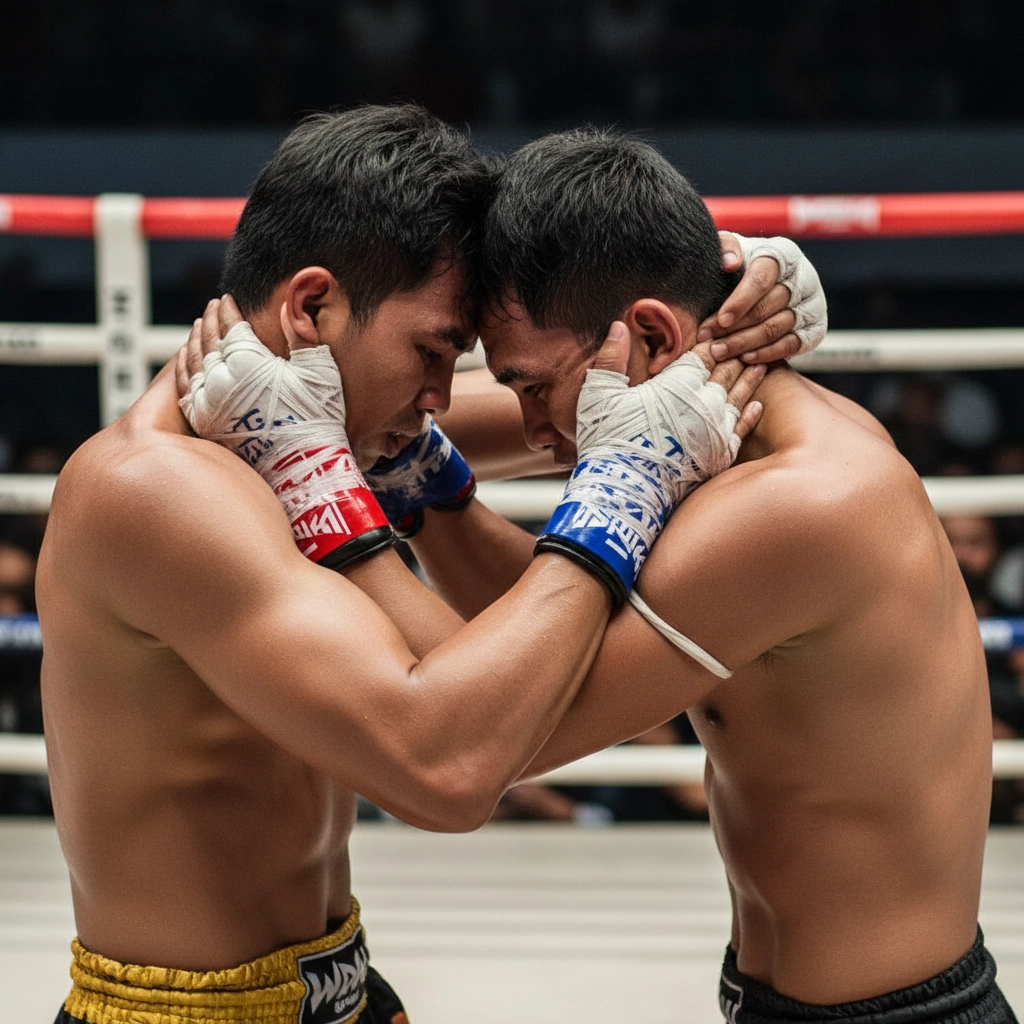
Core positions and grips you must master first
Before attempting advanced trips or finishes, lock in reliable grips and a solid posture. These basic positions form the foundation of every effective clinch sequence.
Primary grips explained
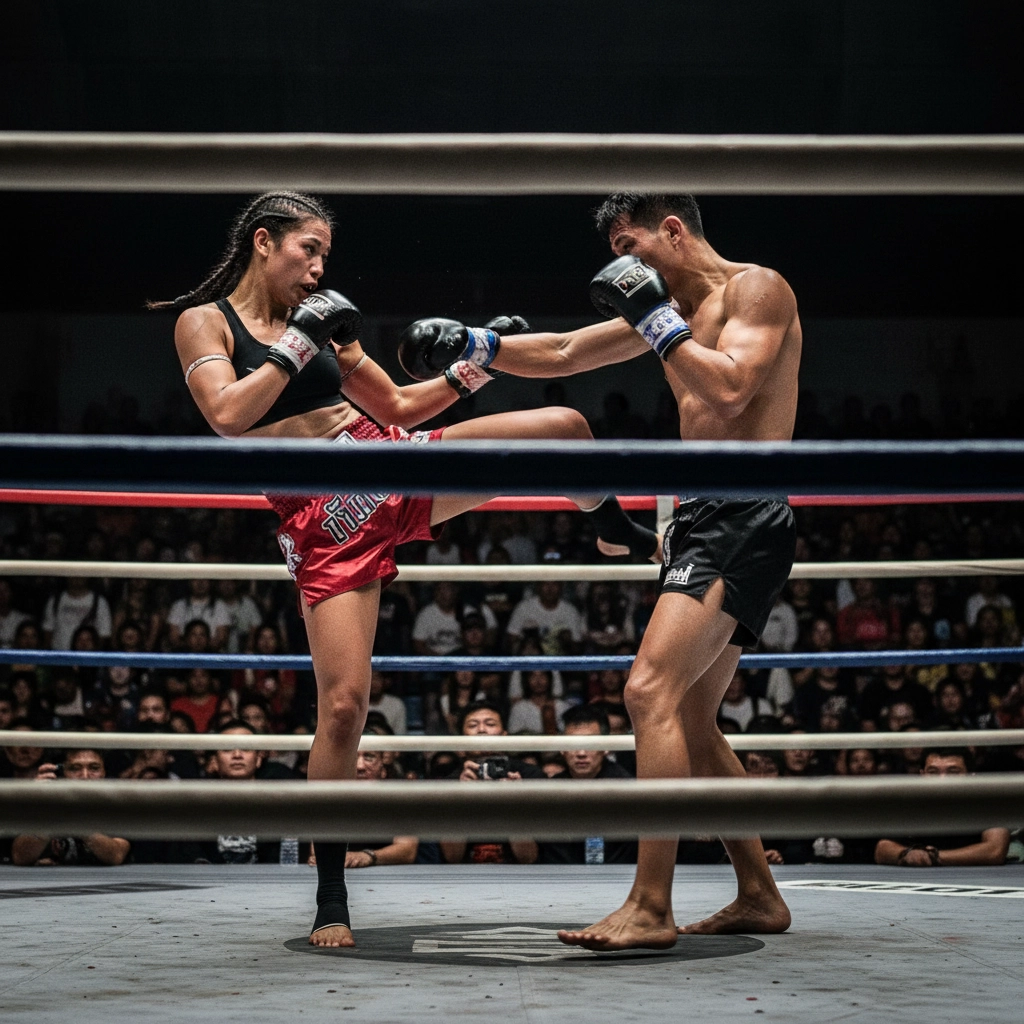
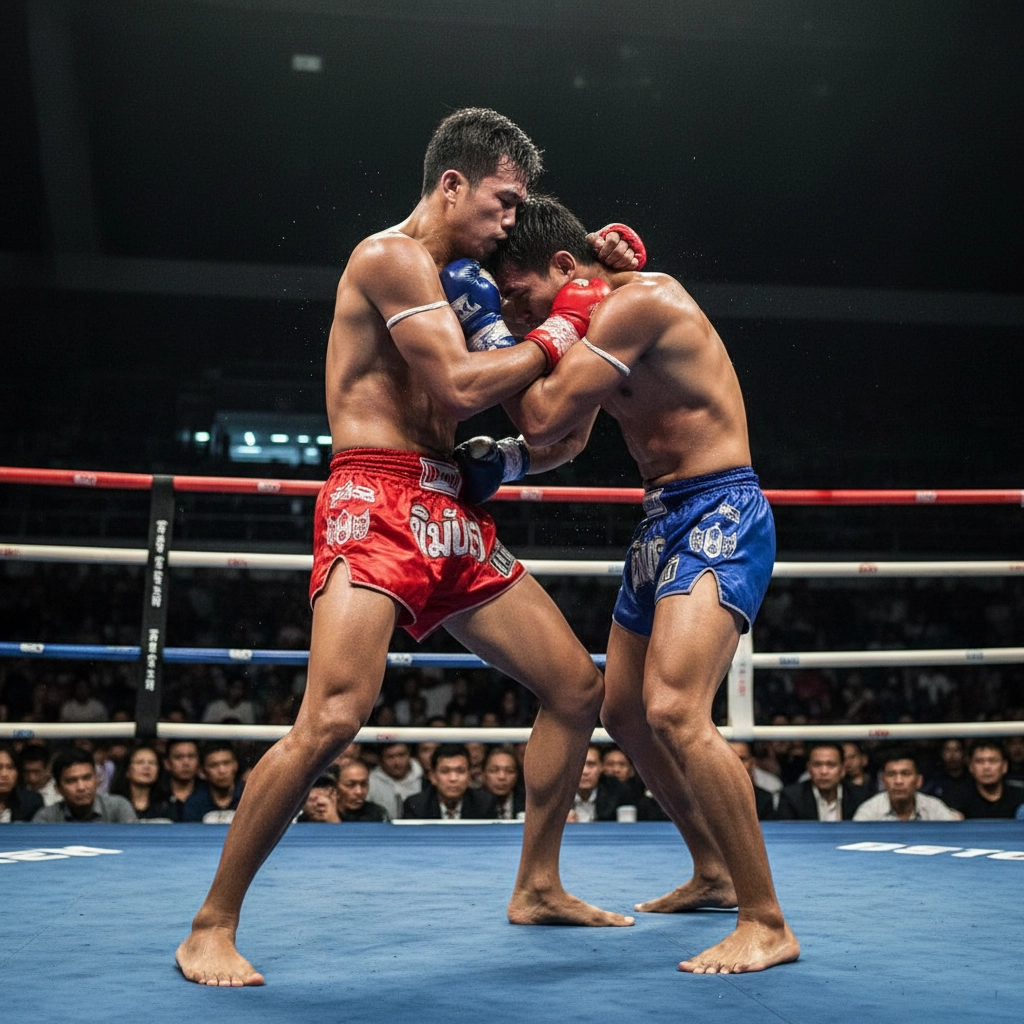
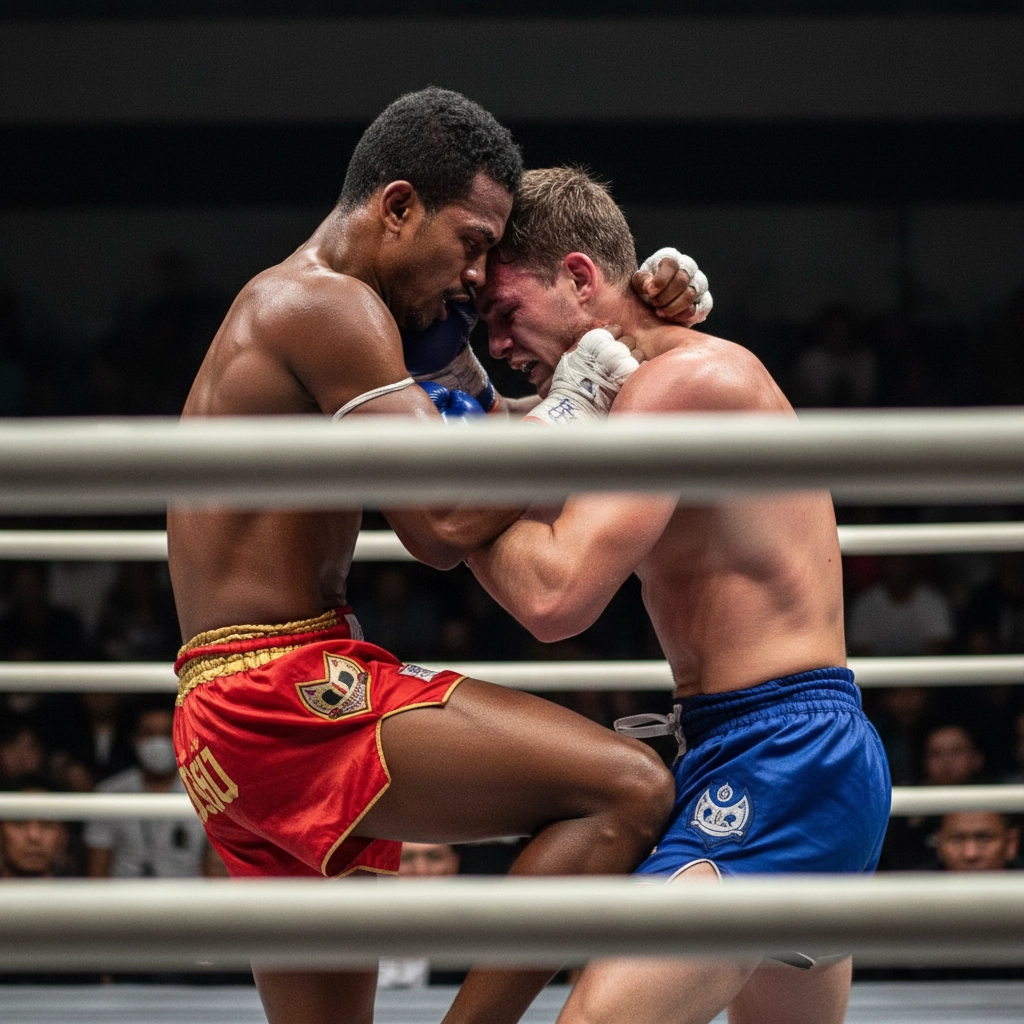
- Double collar tie (Thai plum): Both hands control the back of the head and neck. This grip gives you direct access to vertical knees and control of the head to lift and off-balance your opponent.
- Over-under clinch: One arm under the opponent’s arm and the other over. This grip becomes a gateway to breaks, pivots, and lateral throws when you establish underhook leverage.
- Single underhook and body control: Useful for turning and setting up trips; maintain chest-to-chest contact and a strong hip connection.
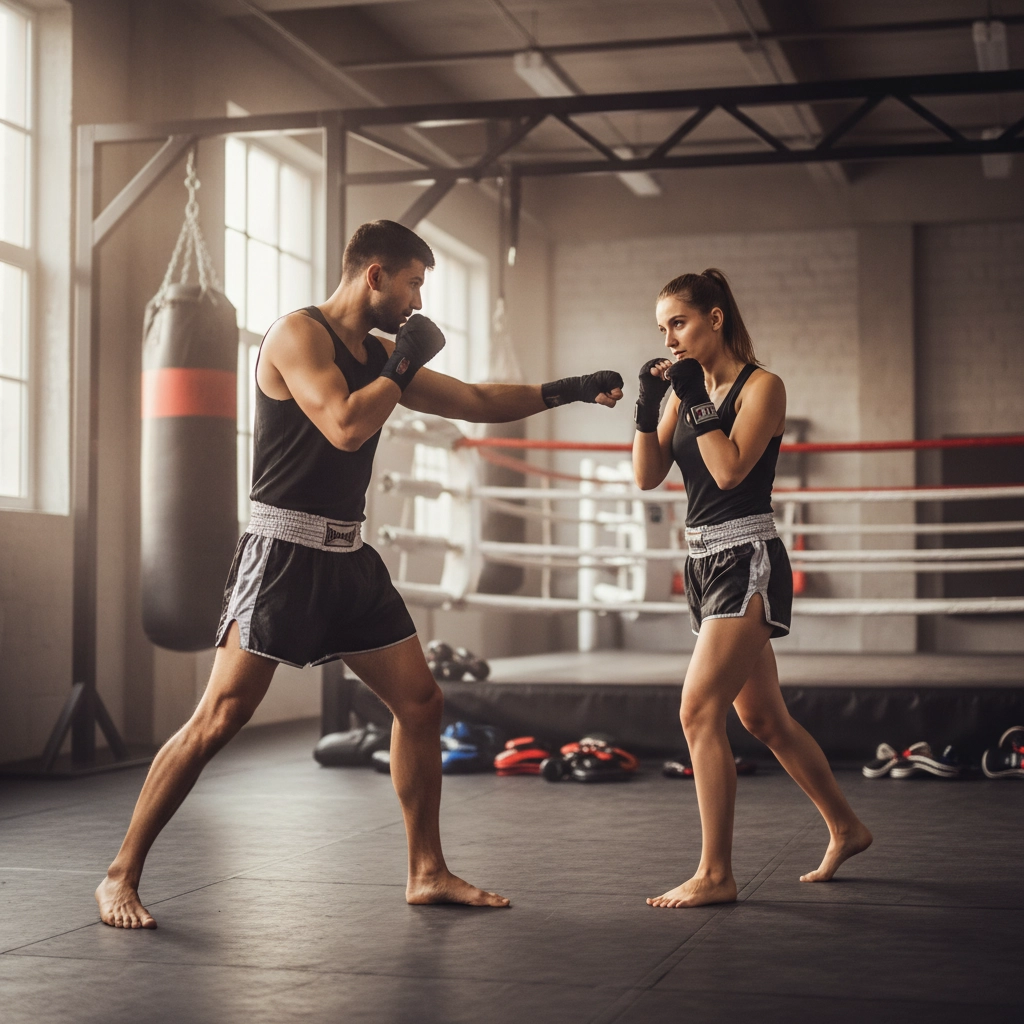
Posture, footwork, and head placement rules
- Keep your posture slightly upright with your chin tucked; don’t collapse forward or let your base be pulled out from under you.
- Lead with your hips — control the opponent’s hips to control their base. Move your feet in small, decisive steps to create angles.
- Compress the opponent’s head into your chest when using the plum to limit their breathing and mobility; use your forehead or temple as a frame, not just your hands.
Simple off-balancing and knee-first finishing cues
Once you secure a grip, simple off-balancing wins rounds. Target the opponent’s center line with short, explosive knee strikes while you manipulate their balance with a simultaneous pull or lift. Use these cues:
- Pull the head down and drive your lead knee up to the solar plexus or ribs.
- Step across with your outside foot and turn your hips to create a sweep while maintaining the clinch hold.
- Shift your grip from collar to behind the ear to expose the jaw for elbows when the opponent over-commits.
Practicing these elements slowly builds the timing and sensitivity you need to finish; in the next section you’ll get detailed progressions and drills to turn these cues into reliable fight techniques.
Progressions: Building reliable clinch finishes
Turn the basic cues into dependable finishes by training in tight, progressive steps. Start slow and increase resistance only after you can execute each link smoothly.
- Step 1 — Secure and stabilize: From double collar tie, pin the head to your sternum, get chest-to-chest contact, and plant a staggered base (rear foot slightly back). Practice 10–15 seconds of controlled hold while your partner offers light push-back. Focus on maintaining vertical posture and hip connection.
- Step 2 — Short knee rhythm: Add three short, snapping knees to the body (lead knee then rear, back to lead). Keep the head control constant so the opponent can’t reset. Repeat this in sets of 5–8 reps, emphasizing rebound—return to stance immediately to avoid telegraphing.
- Step 3 — Off-balance and pivot: While pulling the head down on the last knee, step your outside foot across your opponent’s stance and rotate your hips. This creates the angle and unweights their outside leg for a sweep. Drill the step-turn motion slowly until your pivot is smooth.
- Step 4 — Finish options: From the pivot you can: (a) load the sweep by sweeping the unweighted foot and driving your hip; (b) elevate with a vertical knee to the ribs/chest while turning their torso; (c) transition to a hip throw by dropping your level slightly and turning your shoulder into theirs. Practice each finish separately then chain them in sequence.
Drills to ingrain timing, balance, and finishing instincts
Use drills that impose realistic pressure and force you to solve problems rather than just repeat motion. Rotate partners and intensify resistance as competence grows.
- Pummeling-to-knees (2 min rounds): Start with 30 seconds of pummeling to gain the underhook, then 90 seconds where the fighter with the dominant inside arm must land continuous short knees. The defender’s job is to escape or frame—this builds the transition between hand-fighting and striking.
- Controlled resistance sweep drill: Partner A holds a light clinch; Partner B executes the pull-pivot-sweep and finishes with one clean knee. Repeat 6–8 times each side, increasing partner resistance incrementally so you learn the force necessary to unbalance versus brute strength.
- Clockwork knees (conditioning + timing): With head control, set a metronome or count—land 10 knees on the beat, then immediately circle off. This sharpens timing and conditions the core to absorb recoil without collapsing posture.
- Live chaining drill: Begin in an over-under; one practitioner attempts a sweep, the other defends and counters to break the clinch. Run 3-minute rounds where scoring is: 1 point for clean knee, 2 for sweep/throw, 3 for a successful break and strike. This incentivizes finishing while training realistic responses.
Anticipate escapes and counters so your finish stays intact
Every effective finish expects a reply. Train common opponent reactions so you can adjust rather than force a failed technique.
- If they frame under your chin to create space, immediately pummel the inside arm or switch to a two-on-one wrist control to re-establish head pressure.
- When they step out to reset their base, use the momentum—drive forward into a knee or angle off and reap the outside leg for a sweep.
- If they bring a whizzer (overhook) to stop your underhook, counter by circling to the whizzer-side hip and driving a tight hip bump/throw while controlling the triceps.
- Always maintain one good post foot on the mat. If you’re swept, post with your outside hand and leg to recover or convert the momentum into a scramble where you can re-clinch.
These progressions, drills, and anticipations build a clinch game that’s repeatable under pressure—practice them with intent and your “clinch to finish” sequence will become a reliable part of your fight toolkit.
Putting the Clinch to Work
Clinch mastery is a long-game skill: steady, deliberate practice and honest feedback produce the reliable instincts you want in a fight. Train the details—hand-fighting, foot placement, timing—under progressive resistance, protect your neck and partner safety, and focus each session on one measurable goal (e.g., three clean pivots or five uninterrupted knees). When you pair that attention to detail with regular live chaining and situational sparring, the clinch becomes less a scramble and more a controlled platform for finishing. For additional technical perspective and variations, see this Clinch (combat sport) overview.
Frequently Asked Questions
How often should I practice clinch drills to see real improvement?
Aim for short, focused clinch sessions 2–3 times per week in addition to regular striking and conditioning. Start with low-intensity technical drilling and one live clinch round per session; increase intensity and volume gradually as your timing and posture improve.
Are all clinch grips and finishes legal in competition?
Rules vary by organization. Traditional Muay Thai permits the double collar tie (plum), knees, and many throws; some kickboxing or amateur formats restrict prolonged clinching or certain throws. Always check the rule set for your event and train finishes that conform to those rules.
What’s the best way to avoid neck and shoulder injuries while training the clinch?
Warm up the neck and shoulders, practice proper posture (chin tucked, hips engaged), and use progressive resistance—don’t force full-power throws on a fresh partner. Communicate with training partners, tap early, and include neck-strengthening and mobility exercises in your routine to reduce injury risk.