
Practical Muay Thai clinch techniques every beginner should master
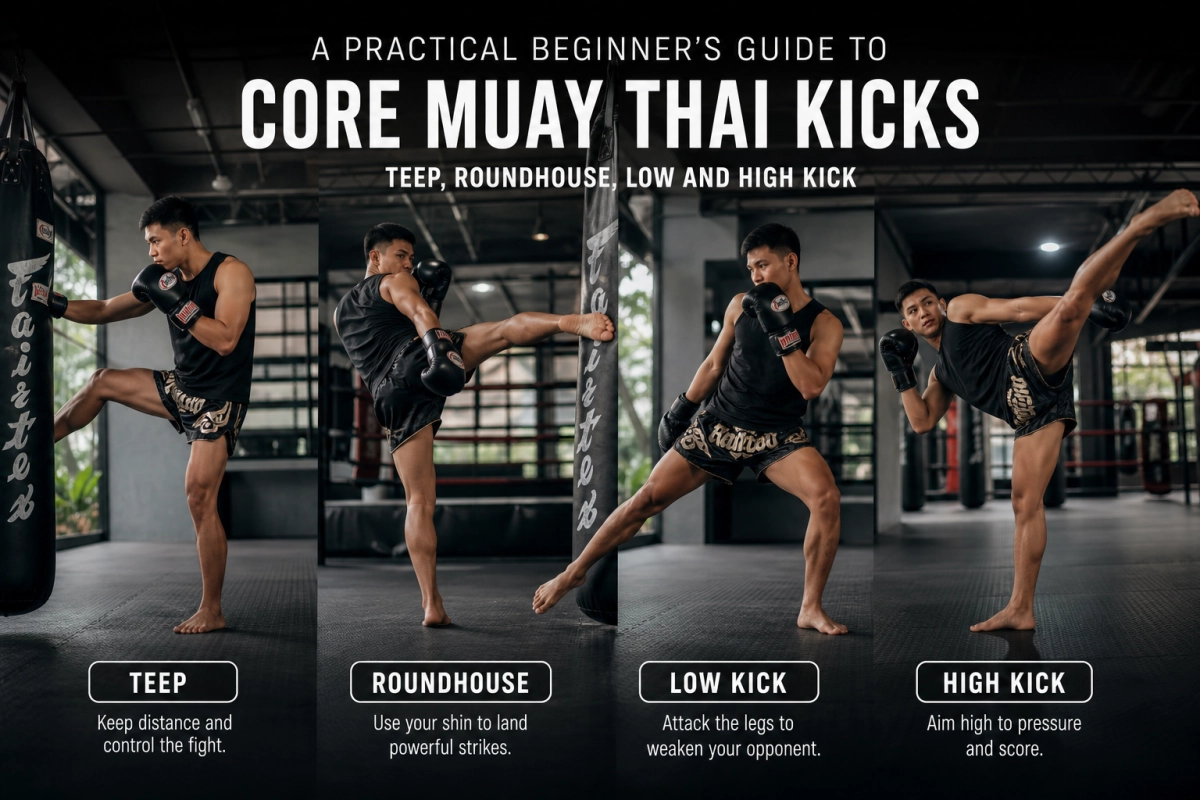
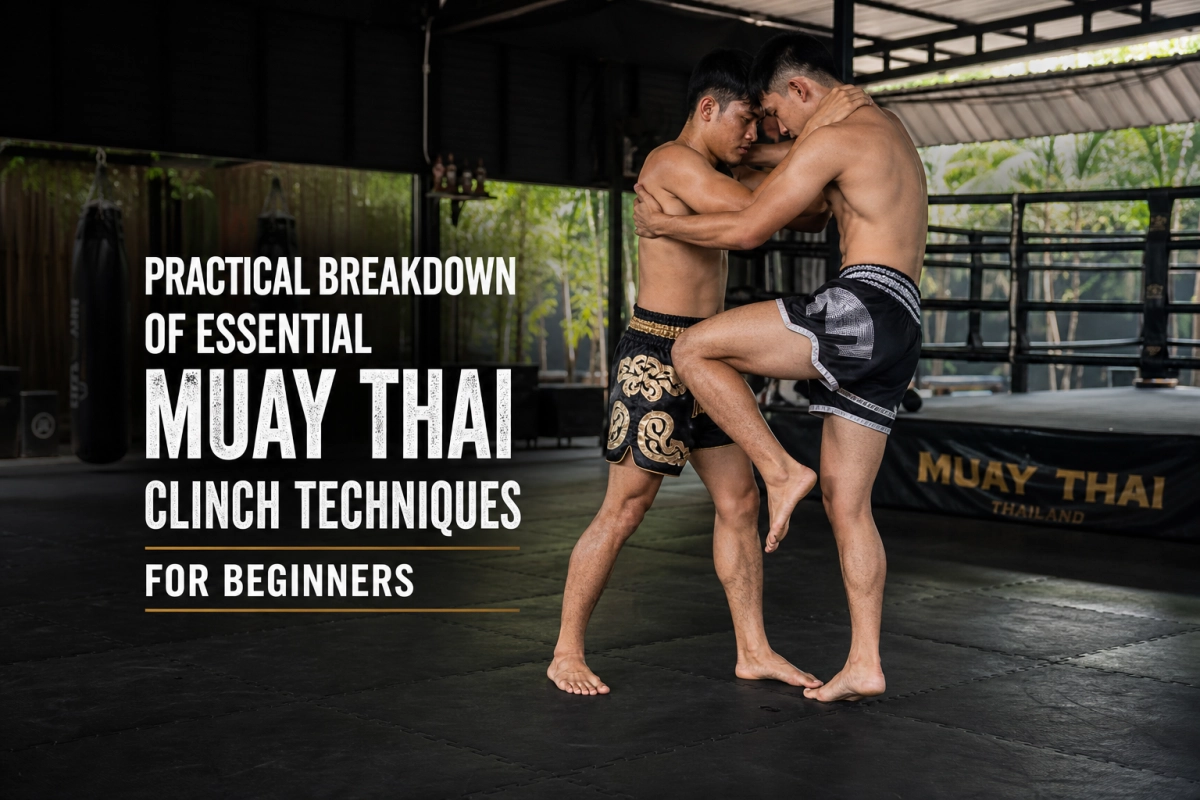
The Muay Thai clinch is a close‑range grappling position central to Thai boxing, used to control an opponent, deliver knees, and set up sweeps. For beginners, learning Muay Thai clinch techniques develops balance, timing, and the ability to dictate the clinch range—skills that complement striking tools like the teep (front push kick) and roundhouse kick. This section focuses on foundational posture, primary grips, and safe drills to build reliable clinch control.
Why clinch control matters and what it accomplishes
Clinch control gives a fighter the ability to off‑balance an opponent, create knee strikes, and disrupt rhythm. Unlike stand‑up striking alone, the clinch emphasizes continuous body contact, head position, and leverage to win close quarters exchanges.
Key purposes of the clinch:
- Control: limit an opponent’s movement and striking angles.
- Attack set‑ups: create openings for knees, elbows, and takedowns or sweeps.
- Defense: neutralize opponents who prefer long‑range striking by closing distance.
Foundational posture, stance, and head position
Correct posture in the clinch centers on a strong, upright spine with slight forward pressure through the chest. Head position—placing the forehead or temple against the opponent’s jaw or sternum—provides leverage and limits their ability to thrust knees freely.
Basic stance and body alignment:
- Feet: hip‑width, knees slightly bent, weight balanced on the balls of the feet to allow pivots and level changes.
- Hips: square to the opponent or slightly turned depending on the grip; avoid over‑rotating the hips away from control.
- Head: press into the opponent’s head/shoulder to control posture; avoid leading with the chin to prevent counters.
Step‑by‑step: getting into the basic collar‑tie
The collar‑tie is a primary grip where one hand controls the back of the opponent’s head or neck. It establishes a dominant frame for knees and off‑balancing.
- Close the distance by stepping inside the opponent’s striking range and maintaining a solid stance.
- Reach one hand behind the opponent’s head, cupping the base of the skull or upper neck—fingers relaxed, thumb along the base of skull.
- Use the opposite hand to control the near arm or to grab the opponent’s elbow/shoulder for additional control.
- Drive your forehead into their chest/face while maintaining a bent knee posture and active footwork to maintain balance.
Common beginner mistakes and defensive considerations
Beginners often overreach with arms, rely on strength instead of positioning, or drop their base—making them vulnerable to throws and knees. Defensive considerations focus on protecting the neck, keeping elbows tight, and avoiding telegraphed pulls.
- Avoid curling the wrist behind the head—use forearm pressure instead of a weak wrist hook.
- Don’t lean straight back; control posture by using hip drive and head pressure.
- Defend incoming knees by controlling lead legs and maintaining inside foot position.
Simple partner drills to build posture and grip strength safely
Progress slowly with partners and prioritize technique over force. Always warm up, use light contact, and work under coach supervision. These drills build muscle memory for clinch entries and head control.
- Static holds (30–60s): establish collar‑tie, switch sides, and focus on posture and breathing.
- Controlled pummeling (1–2 min rounds): alternate hand pummels to secure inside position; maintain light contact and reset often.
- Step‑and‑drive drill: one partner resists slightly while the clincher practices short drives and hip bumps to off‑balance the partner.
Part 2 will build on these basics with off‑balancing mechanics, knee strikes, sweeps, and specific defensive counters to practice in controlled partner sessions.
Off‑balancing fundamentals: how to create and capitalize on imbalance
Off‑balancing (kajorn) is the clinch’s connective tissue—if you cannot unweight or redirect your partner, knees and sweeps lose power. The goal is to break the opponent’s base with minimal force by disrupting their weight distribution, timing entries so their feet are vulnerable.
Core principles:
- Leverage, not brute strength: use head position, hip movement and angles to move the opponent’s center of gravity.
- Combine motion with grips: a short, sharp head pull paired with a hip bump or step creates openings more efficiently than sustained pulling.
- Step to the outside: pivoting off your lead foot opens their base and reduces their ability to post or counter with a knee.
Three practical off‑balancing actions:
- Short head snap: with a collar‑tie, pull the head down and back for 0.5–1 second while driving your forehead into their sternum—follow the pull with a knee or step to capitalize on the reaction.
- Hip bump (shove): drive the hips forward into their chest/solar plexus while turning your lead foot out; it shifts their weight back and can expose a rear leg for a sweep.
- Inside step sweep setup: step your near foot diagonally behind their lead foot, rotate their head with the collar‑tie, and use a small lift or reap to remove the planted foot.
Drill: timed imbalance rounds (2–3 min)
- Partner A holds a light defensive posture; Partner B attempts one off‑balance action every 6–8 seconds, then releases. Rotate roles. Focus on crisp, short actions rather than sustained pulls.
- Coaching cues: watch for the opponent regaining balance—reset and repeat. Keep contact continuous but controlled; stop if the partner stumbles or falls uncontrolled.
Essential clinch knees: targets, mechanics, and combinations
Knees are the primary offensive weapon in the Muay Thai clinch. They require a stable base, good posture, and the ability to open up space or unweight the opponent first.
Targets and intent:
- Body (solar plexus, ribs): the most common target for power and to sap breath.
- Thighs and hips: to destabilize and set up sweeps or takedowns.
- Head (short knees): when the opponent’s posture is collapsed forward—use with caution and control in drills.
Execution essentials:
- Create a small gap—via head snap or hip bump—so the knee can travel without clashing into the opponent’s knee or shin.
- Chamber the knee (hip flexion), thrust from the hips, and drive through with the heel. Keep the opposite foot grounded for balance.
- Use the non‑striking hand to pull the head down or to pin the opponent’s arm to increase impact and limit counters.
Combination drill: two‑knee cadence
- Clincher throws two knees in a 1–2 rhythm: set (head snap) — right knee — left knee. Partner absorbs light contact, focuses on regaining posture and countering with a small push or step out.
- Progression: add a sweep (step‑and‑reap) immediately after the second knee once the partner is off‑balanced.
Sweeps, trips, and safe partner progressions
Sweeps convert off‑balance and knees into dominant positions or scoring techniques. Begin with low‑risk, balance‑based sweeps before moving to reaps or trips that require timing and coordinate foot placement.
Beginner‑friendly sweeps:
- Foot flick (ankle sweep): while controlling the head, use your instep to flick the partner’s heel outward as you pull their head across—low impact, teaches timing.
- Inside reap: step inside their foot, rotate the hips and use the back of your calf to reap their planted foot as you drive the head across their body.
Safe partner drill: progressive sweep flow (3 stages)
- Stage 1 (shadow): practice the footwork and hip rotation solo until comfortable.
- Stage 2 (cooperative): partners perform the sweep slowly; the receiving partner stays relaxed and allows a controlled fall to a knee or seated position. Emphasize breaking the fall with hands and rolling safely.
- Stage 3 (resisted, light contact): apply gentle resistance; the sweeper must time the reap and head control to complete the technique without forcing the partner off balance dangerously.
Safety and common errors:
- Never yank the opponent’s head violently—use controlled pressure.
- Communicate before attempting a full sweep; agree on fall options (knee, sit, or controlled collapse).
- Avoid planting limbs in ways that risk hyperextension—coaches should supervise new techniques until partners demonstrate safe breaks.
Defenses, escapes, and common counters
Defending the clinch is as much about structure and footwork as it is about hand fighting. Prioritize creating immediate frames or underhooks, maintaining a balanced base, and clearing the opponent’s grips before attempting a counter.
- Hand fighting and pummels: win inside control by pummeling aggressively—establish underhooks or a strong two‑hand frame to free your head and hips.
- Frame and create distance: use forearms on the hips or sternum to push away and re‑establish striking range; keep your chin tucked and elbows tight while you reset.
- Whizzer/overhook defense: secure an overhook on the attacking arm to block lifts and set up turns or counters; combine with a hip turn to regain posture.
- Escape by circling: step laterally and circle out of the clinch toward your lead side, breaking grips with both hands while retaining a defensive posture.
- Counter opportunities: when the clincher overcommits on a head pull or hip bump, counter with a long knee, a push‑out, or a quick circle and counterstrike once distance is created.
Simple, safe partner circuit for building fight‑ready clinch control
Rotate partners through short rounds that focus each pass on one skill. Keep contact controlled, use agreed fall options for sweeps, and have a coach or senior partner supervise beginners.
- Round A — Pummeling and posture (2–3 minutes): nonstop pummels for inside control; pause every 30–45 seconds to reset and switch sides.
- Round B — Off‑balance and knees (2 minutes): perform a head snap or hip bump every 6–8 seconds followed by one to two knees; partner practices regaining posture safely.
- Round C — Sweep progression (3 minutes): Stage 2 cooperative to Stage 3 light resistance; sweeps end in agreed, controlled fall options only.
- Recovery and feedback (1–2 minutes): debrief with partner or coach on what worked, what was lost, and one technical focus for the next round.
Train consistently, train smart
Clinch skill develops through repetition, attention to detail, and gradual exposure to resistance. Prioritize technical drilling, respectful partner work, and progressive intensity. Seek regular coaching feedback, listen to your body, and keep safety at the center of every practice—your progress will follow.
Recommended Posts